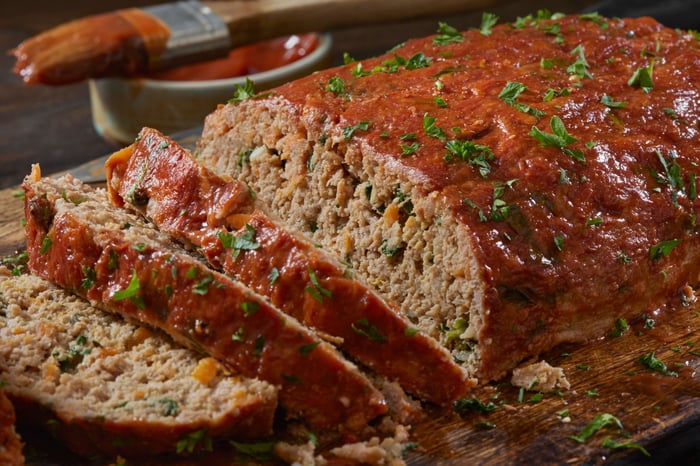
Meatloaf is a timeless dish that has graced dinner tables for decades. While it's loved for its comforting flavors and versatility, traditional recipes often come with a downside: excess fat. The good news? By using the right meatloaf pan technique, you can create a leaner version of this classic dish without sacrificing taste or texture. Here’s everything you need to know about optimizing your pan for healthier cooking.
The Role of the Meatloaf Pan in Healthier Cooking
Not all pans are created equal when it comes to preparing meatloaf. A specialized meatloaf pan can help reduce fat content significantly. These pans typically come with an insert that allows grease to drain away from the meatloaf as it cooks. The result? A dish that’s not only healthier but also less greasy, offering a more enjoyable dining experience.
Using a standard loaf pan often means that the meatloaf sits in its own rendered fat, absorbing it throughout the cooking process. In contrast, a dedicated meatloaf pan promotes better drainage, making it a smart investment for anyone looking to prepare leaner meals.
Benefits of Using a Meatloaf Pan
Fat Reduction: The primary advantage of a meatloaf pan with a drainage insert is its ability to separate fat from the meat. This technique reduces the overall calorie count of your dish without altering its flavor profile.
Even Cooking: The design of these pans ensures that heat circulates evenly around the meatloaf, helping it cook thoroughly without drying out.
Easy Cleanup: Many of these pans are non-stick and dishwasher-safe, making post-dinner cleanup a breeze.
Better Texture: By draining excess grease, the meatloaf maintains a firm texture, preventing it from becoming overly soggy.
Step-by-Step Guide to the Meatloaf Pan Technique
Ready to transform your meatloaf? Follow these steps to make the most of your meatloaf pan:
Choose the Right Pan: Look for a pan with a removable insert or tray. These are specifically designed to separate grease from the meatloaf as it cooks.
Prepare Your Ingredients: Use lean ground meat, such as ground turkey, chicken, or a mix of lean beef and pork. Add moisture-retaining ingredients like grated vegetables, breadcrumbs, and eggs to keep the meatloaf tender.
Assemble the Meatloaf: Mix your ingredients in a large bowl, then shape the mixture into a loaf. Place it onto the insert or tray of your meatloaf pan.
Preheat the Oven: Set your oven to the temperature specified in your recipe, usually between 350°F and 375°F.
Bake: Place the meatloaf pan on the middle rack of your oven. The drainage insert will allow fat to drip into the bottom of the pan as the meatloaf cooks. Bake until the internal temperature reaches 160°F for beef or 165°F for poultry, as measured with a food thermometer.
Rest Before Serving: Let the meatloaf rest for 5-10 minutes after removing it from the oven. This helps retain juices and makes slicing easier.
BakeIns Healthy Meatloaf Pan Set
Enhancing Your Meatloaf Recipe for a Healthier Twist
To complement the benefits of your meatloaf pan, consider these ingredient swaps and additions:
Use Whole Grains: Substitute traditional breadcrumbs with whole-grain options or oats for added fiber.
Incorporate Vegetables: Finely grated carrots, zucchini, or mushrooms not only add moisture but also boost the nutritional content of your meatloaf.
Choose Low-Sodium Options: Opt for low-sodium ketchup or tomato sauce to cut back on sodium levels.
Experiment with Spices: Enhance flavor with herbs and spices like parsley, garlic, onion powder, and paprika instead of relying on salt.
Caring for Your Pan
To ensure the longevity of your pan, follow these maintenance tips:
Clean Thoroughly: After each use, wash the pan and insert with warm, soapy water or place them in the dishwasher if they’re dishwasher-safe.
Avoid Metal Utensils: Use silicone or wooden utensils to prevent scratching the non-stick surface.
Store Properly: Keep your pan in a dry place to prevent rust or damage.
Why the Right Technique Matters
Cooking leaner meatloaf is more than just a matter of swapping ingredients. The way you cook and the tools you use play a significant role in achieving a healthier dish. A well-designed pan ensures that the excess fat is removed efficiently, giving you a meal that’s both nutritious and delicious.
Bonus Recipe: Healthy Meatloaf with a Twist
Try this recipe to make the most of your pan:
Ingredients:
1 pound lean ground turkey
1/2 cup whole-grain breadcrumbs
1/2 cup grated zucchini
1/4 cup diced onion
1 egg, beaten
2 tablespoons low-sodium ketchup
1 teaspoon garlic powder
1 teaspoon dried parsley
1/2 teaspoon smoked paprika
Salt and pepper to taste
Instructions:
Preheat your oven to 375°F.
In a large mixing bowl, combine all ingredients until well incorporated.
Shape the mixture into a loaf and place it on the insert of your pan.
Bake for 40-50 minutes, or until the internal temperature reaches 165°F.
Remove from the oven and let rest for 5 minutes before serving.
Final Thoughts
Cooking leaner meatloaf doesn’t have to be complicated. By incorporating the meatloaf pan technique into your kitchen routine, you can enjoy a healthier version of this classic comfort food. Whether you’re hosting a family dinner or meal prepping for the week, a dedicated pan is a simple yet effective tool to elevate your cooking. With the right ingredients and approach, your meatloaf can be both nutritious and satisfying.

